Showing posts with label cayenne. Show all posts

Thursday, March 18, 2010

Seri セリ


Man have I gotten bad about updating.  I apologize.  If anyone can figure out a way for me to be able to post from work I'm all ears!

Seri, known as Japanese parsley or Chinese celery, is a springtime vegetable found for only a few short weeks here in Japan.  Seri is high in vitamins C and A as well as potassium.  It tastes great fresh just thrown in a salad and can also be used in stews, stir-fries, and soups.

How to Prepare
Make sure to select seri that is bright in color and not wilted or musty looking.  It should look similar to cilantro or other leafy herbs.  From there just chop it up and throw it in your recipe!

Easy Seri Recipe

While seri is best known for its role in the traditional spring dish nanakusa no sekku, all seven of those vegetables can kind of be a pain to get a hold of.  Instead will make a tasty fresh salad with our seri!

Seri and Chicken Salad
Makes 4 servings

Prep Time: About 30 minutes

Ingredients:
  • 1 bunch of seri
  • 300 grams chicken breast
  • 1/2 a red onion
  • 40 grams harusame (super thin rice noodles)
  • 4 tablespoons peanuts, crushed
  • pinch of salt
  • 2 teaspoons and 2 tablespoons vinegar, divided
  • 2 teaspoons fresh lemon or lime juice
  • 4 tablespoons fish sauce (also known as nam pla)
  • 1 tablespoon sugar
  • 1 togarashi pepper, chopped or 1 teaspoon dried togarashi
  • 1 clove garlic, minced
  • 1/2 teaspoon minced ginger
Preparation:

1.     Roughly chop seri.  Thinly slice the red onion and place into cold water.
2.     Cook harusame according to package directions, then place in cold water to stop from cooking further.  Drain and chop into bite sized strands.
3.    Cut chicken into bite sized pieces.  Season with pinch of salt and 2 teaspoons vinegar.  Cook in microwave for two minutes or until cooked through.
4.    Mix together remaining vinegar, lemon juice, fish sauce, sugar, togarashi, garlic, and ginger.
5.   Drain red onions.  Toss together seri, onion, harusame, chicken, and dressing.
6.  Place into small bowls and garnish with peanuts.
7.  Finished!


Friday, February 19, 2010

Ninniku no Me にんにくの芽


Ninniku no me is the Japanese name for garlic sprouts.  These greens are super tasty with a light garlic flavor.  They are usually sold in packs in the refrigerated section and are a versatile vegetable.
How to Prepare
Garlic sprouts are similar to asparagus in texture and can be used in the same ways.  Simply cut them down to whatever size you want and start cooking.  Garlic sprouts can be a little tough when raw so it’s best to cook them first, though if chopped finely they can be thrown in with salad or fresh spring rolls.  I most often use them in stir fries and sautés cut into bite sized pieces.

Easy Garlic Sprouts Recipe

Garlic sprouts are easy to include in just about any recipe.  This stir-fry recipe is super easy and only takes about 45 minutes to make including marinating time.

Garlic Sprouts Stir-fry
Makes 2-3 servings

Prep Time: About 45 minutes

Ingredients:
  • 3 tablespoons soy sauce
  • 1 tablespoon rice vinegar 米酢
  • 1 tablespoon honey
  • 1 teaspoon sesame oil ゴマ油
  • 1/2 teaspoon dried red pepper とうがらし
  • about 200 grams chicken, cut into bite sized pieces
  • 1/4 cup water
  • 1 teaspoon cornstarch コーンスターチ
  • 2 tablespoons sesame oil, divided
  • 6 shiitake mushrooms, stemmed, caps quartered
  • 1 colored bell pepper, cut into strips
  • 1/2 package garlic sprouts, cut into bite sized pieces
  • 1 tablespoon minced fresh ginger
  • 1/2 cup matchstick sized carrot strips
  • 1/2 cup broccoli, cut into bite sized pieces
Preparation:

1.     Whisk first 5 ingredients in medium bowl to blend.
2.     Add chicken and stir to coat; let marinate 30 minutes.
3.     Drain, reserving marinade in small bowl. Whisk 1/4 cup water and cornstarch into marinade.
4.     Heat 1 tablespoon oil in large skillet over medium-high heat.
5.     Add chicken and sauté until golden, about 3 minutes. Using slotted spoon, transfer chicken to plate.
6.     Add remaining 1 tablespoon oil to skillet.
7.     Add mushrooms and stir-fry until tender, about 3 minutes.
8.     Add carrots, broccoli and garlic greens; stir-fry 2 minutes.
9.     Add bell peppers; stir-fry 2 minutes.
10.  Add garlic and ginger; stir-fry 30 seconds.
11.  Return chicken to skillet; drizzle reserved marinade mixture over everything.
12.  Stir-fry until marinade thickens slightly, about 30 seconds. Season to taste with salt and pepper.
13.  Finished! 


Thursday, January 28, 2010

Konnyaku こんにゃく


Konnyaku is a curious thing.  Is it a vegetable, an animal, an amorphous blog of atoms?  Turns out it actually is a plant, and an ugly one at that.  I'd be curious to know why the first human who ate it decided to even approach the thing.  Maybe he was starving and delirious in the jungle.  Apparently it's called konjak in English, but as I've never heard that word in my life, I'm content to call it konnyaku.  Konnyaku doesn't have much of a taste and comes in a variety of shapes and sizes, all of them gelatinous in nature.  You can also get konnyaku that has been infused with such things as mushrooms and cayenne pepper.  My favorite is the spicy konnyaku, particularly the noodle shaped one.
As far as nutrition goes, you know the cabbage diet?  The one where you eat lots and lots of cabbage because it has very little calories or nutritional value  so you can eat as much as you want?  Konnyaku is Japan's answer to the cabbage diet.  It's fat free, contains next to nothing in calories, and has lots of fiber.  So it's a great filler food but don't rely on it as your sole sustainance.  Probably the greatest thing about konnyaku is it's cheap, so you can throw it in to just about any recipe to bulk it up without affecting its flavor.


How to Prepare
Konnyaku comes packed usually in fish broth so you'll want to drain that.  You can find varieties that are packed in water as well.  Once it's drained it's ready to go!  If you buy a big block you can cut it into any shape you want.  Or you can buy ones shaped as noodles, balls, on a stick, if you can imagine it, konnyaku has been shaped into it.  Konnyaku can be eaten hot or cold, stewed, steamed, boiled, frozen, just about any way you want.

Easy Konnyaku Recipe

My favorite way of eating konnyaku is in nabe, but you can also throw it into stir-fries and other dishes easily.

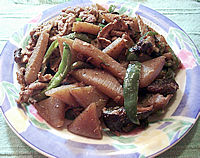
Pork and Konnyaku Miso Stir-fry

Makes 4 servings

Prep Time: About 1 hour

Ingredients:


  • 2 sheets of konnyaku, cut into triangles
  • 150 grams pork, cut into 4 cm strips
  • 1 tablespoon sesame oil
  • 1 small pack shiitake mushrooms, destemmed and cut into halves
  • 2 green peppers, cut into strips
  • 1/2 onion, thinly sliced
  • 2 cups cabbage, chopped
  • 3 tablespoons cooking sake, divided
  • 2 tablespoons soy sauce, divided
  • 2 teaspoons sugar
  • 1 teaspoons garlic, minced
  • 1 teaspoons ginger paste
  • 1 teaspoons togarashi
  • 1 tablespoon water
  • 30g miso paste 味噌
Preparation:
1.  Mix together 2 tablespoons sake, 1 tablespoon soy sauce, miso paste, sugar and water.  Add pork and konnyaku to the marinade.  Allow to marinate for about 20 minutes.
2.  In a frying pan, heat sesame oil over medium high.  Add onions to frying pan.  Saute until starting to become translucent.
3.  Add green peppers, cabbage and mushrooms to frying pan.  Saute for 3-4 minutes, or until green peppers being to soften.
4.  Add garlic, ginger, togarashi, remaining sake and soy sauce.  Saute for 1 minute or until fragrant.
5.  Add pork, konnyaku, and sauce.  Saute until pork has browned and sauce has begun to thicken.
6.  Serve with rice.
7.  Finished!


Wednesday, December 16, 2009

Shishito ししとう


Shishito, the longer, skinnier cousin of the green bell pepper. Shishito also happen to be much tastier than Japanese green bell peppers and I use them whenever I can in recipes that call for bell pepper. The most famous of the shishito are manganji tougarashi. These are shishito grown exclusively in Kyoto, so lucky for you if you're in the Kyoto area. Other shishito are just as tasty and can be readily found at the farmers' markets. For those outside of Japan, you can try looking in Asian supermarkets, or standard green bell peppers are a close enough substitute. And like bell peppers, shishito are a great source of vitamins C and A.

How to Prepare
With the smaller shishito, you can cook them whole, which is what I usually do because I'm lazy. Even the stems of shishito can be eaten so simply cut up the shishito however you want.

Easy Shishito Recipe

The snow-filled winds are encroaching on Shiga so pots of hot, tasty goodness are where it's at!

Jambalaya


Serves 4-6

Prep Time: About 1 hour

Ingredients:


  • 1 tablespoon olive oil
  • 1 large onion, chopped
  • 2 cloves garlic, peeled
  • 1 package of shishito, chopped or 1 large bell pepper, seeded and chopped
  • 2 celery stocked, diced
  • 3 tablespoons parsley, minced
  • 1 small package sausage, cut into bite-sized slices. (For people in Japan, I recommend going to Amica or the Brazilian market to buy sausage. Otherwise, the "chorizo" at the regular supermarket will do the trick)
  • 1 chicken breast, skin removed and chopped
  • 1 large bay leaf
  • 1 tsp cayenne pepper
  • 1 can diced tomatoes
  • 1 can beans, drained
  • 1 can tomato sauce
  • 3/4 cup brown rice, uncooked
  • 1 package medium sized shrimp, peeled
  • 2 cups chicken broth
Preparation:
1. Add oil to a large saucepan.
2. Over medium heat, sauté onion, garlic, bell pepper and celery until onion is translucent.
3. Add parsley, sausage, chicken, bay leaf, and cayenne pepper. Cook, stirring often, 5 to 6 minutes.
4. Add tomatoes (with juice), tomato sauce, and 2 cups chicken broth. Gently simmer, uncovered, stirring occasionally, about 5 minutes.
5. Pour rice and beans into the pan and stir well. Bring mixture to a boil. Lower heat and simmer, covered, 45 minutes or until rice is cooked and absorbs most of the liquid.
6. Stir in shrimp and cook 5 minutes more.
7. Remove bay leaf. Season to taste with cayenne pepper and salt.
8. Finished!

Sunday, December 13, 2009

Miso 味噌


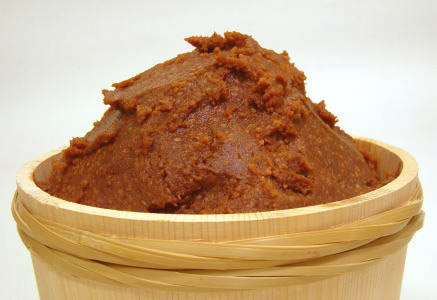
Miso isn't technically a plant, but it's made from plants, and most of us have no idea how to use it other than in miso soup.  Miso is made from soybeans, salt, and the colonel's blend of secret spices to make a versatile paste that can be added to many recipes for salty goodness.  They make white miso, red miso, chunky miso, smooth miso, miso that climbs on rocks.  They each have their own merits and it's worth trying out different kinds.  Personally I like white miso when you're looking for a subtle miso taste and the darker misos for in your face miso explosion.  Best of all, miso doesn't really seem to expire so you don't really have to worry about it spoiling on you.

How to Prepare
If you are adding miso to a sauce, marinade, soup, etc, add a small amount of warm water to the paste and whisk it with a fork until smooth.  This makes it much easier to mix into whatever your making.  Or you can be like me and just dip vegetable sticks into it for insta-dip.

Easy Miso Recipe


This recipe requires the best miso known to man, habanero miso (make sure to get the red one for this recipe).  If you don't have time to go down to Kyoto and discover the amazing habanero store, you can sub any red miso paste for the miso and chili oil for the sesame oil.  If chicken isn't your thing, I have also made these using fried tofu squares and it's just as tasty.

Sticky Sesame Chicken Wings


Serves 4 for main dish, 8 for appetizer

Prep Time: About 1 hour

Ingredients:


  • 1 large garlic clove, crushed and minced
  • 2 tablespoons soy sauce
  • 2 tablespoons habanero miso + 1 teaspoon warm water to make smooth
  • 2 tablespoons honey
  • 1 teaspoon sesame oil
  • Pinch of togarashi
  • 800 grams chicken wings or drumsticks
  • 1 1/2 tablespoons toasted sesame seeds
  • 1 scallion, chopped 
Preparation:
1. Place chicken in a baking dish, evenly spread.  Bake at 180 degrees Celcius for 20 minutes or until mostly cooked.  Remove from oven and allow to cool.
2. Mince garlic and mash to a paste using a large heavy knife.
3. Transfer garlic paste to a large bowl and stir in soy sauce, miso, honey, oil, and cayenne.
4. Add wings to sauce, stirring to coat.  Allow to marinate for about an hour.
5. Either using your fish grill or a BBQ grill, grill wings until full cooked and sauce is just beginning to char.
6. Transfer wings to a large serving bowl and toss with sesame seeds and scallion.
7. Finished!

I have made these several times for BBQs and potlucks and they have always been a big hit!

Thursday, December 10, 2009

Beni-imo 紅芋

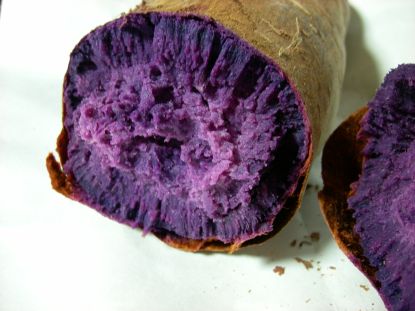
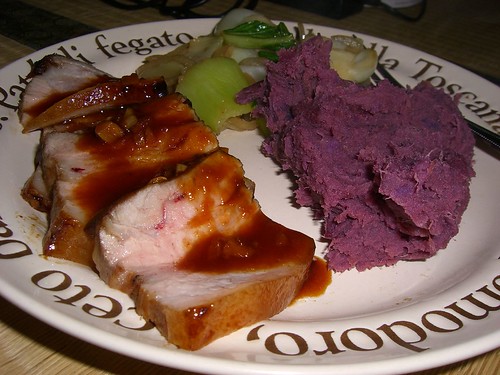
In Japan, schools often take their class trip to Okinawa, a subtropical island a stone's throw from Taiwan.  One of the better known vegetables from Okinawa is purple sweet potatoes, known as beni-imo or murasaki-imo in Japanese.  I found them at the market today so they're officially in season!  Purple sweet potatoes are awesome because they're bright purple.  How many natural foods can claim that?  They have a milder taste than orange sweet potatoes but can be used in all the same ways.  I've even made purple sweet potato pie from these potatoes which made the pie look like it was radioactively glowing.  Kick ass!

Outside of Japan, I have heard more and more markets are carrying purple sweet potatoes.  So take a look around or ask your local farmers at the farmers' market.  Maybe if you pique their interest enough they'll look into growing them!

How to Prepare
Same way you would any potato:

Easy Beni-imo Recipe
When your star ingredient is such a cool color, you want a way to showcase it!

Jazzed Up Mashed Sweet Potatoes

Serves 2-3

Prep Time: About 30 mins

Ingredients:
  • 2 large purple sweet potatoes, either roasted in the oven or cooked in the microwave
  • 2 tablespoons butter or olive oil
  • 1/4 cup milk
  • 1/2 teaspoon salt
  • 1/4 teaspoon togarashi
  • 1/4 teaspoon cinnamon
  • 1/2 teaspoon finely grated lime zest
  • 1.5 tablespoons lime juice
  • 1/4 cup chopped fresh cilantro OPTIONAL
Preparation:
1. Cut open sweet potatoes and scoop out their innards into a bowl.
2. Add rest of the ingredients.  Mash together until well blended.
3. Serve!

I really like these potatoes with some pork chops or chicken that has been marinated in some sort of cumin marinade.


Wednesday, December 9, 2009

Kabosu かぼす


Continuing with the citrus theme, let's take a look at kabosu.  Kabosu is grown widely in Oita prefecture but more of an oddity up here in Shiga.  Kabosu is considered a sour orange and has a taste similar to limes and shikwasa.  The lighter in color the kabosu becomes, the sweeter it will taste, but when cooking you want it on the sour side so don't let them become too yellow.  If you can't find kabosu where you are (and if you're outside of Japan that's a good possibility) key limes make a good substitute.


How to Prepare
Just like any citrus, juice it and zest it!  Kabosu tends to have lots of small seeds so be prepared to fish them out of the juice.

Easy Kabosu Recipe
This recipe is about as easy as it gets!

Red Snapper with Chili Kabosu Butter


Serves 4

Prep Time: About 1 hour

Ingredients:

  • 1/4 stick (2 tablespoons) unsalted butter, softened
  • 1/2 tablespoon finely chopped shallot
  • 1/2 teaspoon finely grated fresh kabosu zest
  • 1 teaspoons fresh kabosu juice
  • 1/2 teaspoon minced fresh cayenne pepper or 1/4 teaspoon dried
  • 1/4 teaspoon salt
  • 1/4 teaspoon dried lemongrass or fresh lemon balm OPTIONAL
  • 4 pieces snapper fillets with skin
  • 1/2 teaspoon salt
  • 1/2 teaspoon black pepper
  • 1 1/2 tablespoons vegetable oil
Preparation:
1. Stir together butter, shallot, zest, kabosu juice, chile, salt, and lemongrass in a bowl.
2. Score skin of fish in 3 or 4 places with a thin sharp knife to prevent fish from curling (do not cut through flesh)3. Pat fish dry and sprinkle with salt.
4. Heat oil in a skillet over moderately high heat until just smoking, then sauté fish, turning over once with a spatula, until golden and just cooked through, 4 to 5 minutes, and transfer to a plate.
5. Serve each piece of fish with a dollop of chile lime butter.
6. Finished!

Serve this fish with a side of rice and some steamed veggies for a quick weekday dinner!
If you can't find snapper, any firm white fish will suffice.  Cod is a good choice here in Japan but be sure to thoroughly rinse the fish before cooking as it's usually heavily salted.

Thursday, November 26, 2009

Natto 納豆

Natto is the product of leaving your soybeans out for too long so they start to ferment and become questionable. Natto is a rich source of protein and contains pyrazine and nattokinese, thought to prevent blood clotting and thrombosis. Natto conspiracists even tried to claim natto would make you lose weight, causing the Great Natto Shortage of 2007, but it was soon found out the entire thing was made up. As many people in the Kansai area will tell you, its sticky texture and overpowering smell makes it better suited for a trashcan than your mouth but I suppose it's something everyone should try at least once.

How to Prepare
Open the package, hold your nose, and stir it up!

Easy Natto Recipe
Here is a recipe that takes care of the two issues most people have with natto, the texture and the smell.

Natto Fried Rice
Serves 2-3
Prep Time: About 30 mins

Ingredients:
  • 2 cups of cooked rice or brown rice
  • 1 pack (50g) of natto
  • Approx. 1 cup chopped scallions
  • Approx. 1 cup chopped vegetables, whatever you have on hand - peppers, carrots, greens, broccoli, etc.
  • 1/4 cup shredded pink pickled ginger 紅生姜
  • 1 tablespoon sesame oil ゴマ油
  • 1 teaspoon togarashi
  • 2 Tablespoons soy sauce
  • Salt and pepper to taste
Preparation:
1. Chop up all the vegetables.
2. Heat up a wok or large non-stick frying pan with 1/2 of the sesame oil. Add the green onions and the vegetables, and sauté until the vegetables are a little limp.
3. Add the natto and 1 Tbs. of soy sauce. Sauté until the stickiness of the natto has dissipated.
4. Add the rest of the oil, the ginger and the rice. Stir-fry until the rice and the other ingredients are evenly mixed. Push the mixture to one side, and add the rest of the soy sauce to the bare surface of the pan. Stir-fry a couple of minutes more until everything looks and smells toasty.
5. Season with pepper (probably needed) and salt (probably not needed - taste some before adding!)
6. Finished!